This example of implementation will aid you to setup a e-commerce solution integrating E-goi’s Track & Engage product with Google Tag Manager, we’ll assume you’r already familiarized with the GTM configuration system and show one way to integrate with this solution.
Here we’ve set up 4 variables for the entities that make sense for this integration. All of them need to be created based on your backend information and this step might vary based on your business logic.
We created the following variables:
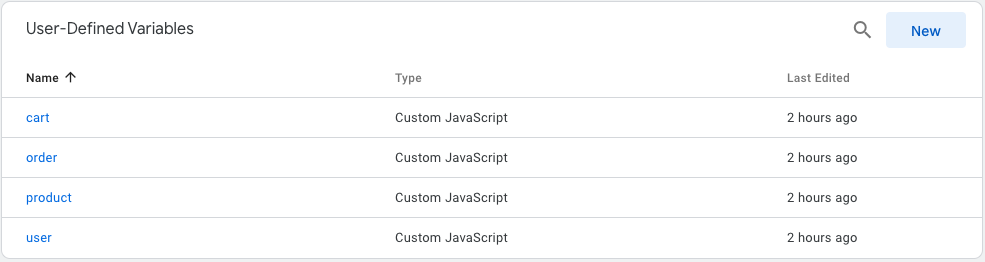
Their name is self explanatory, we have a basic logic were we assume false values when they are not present or a object if it is present.
Note: we are using 0 as false in this case.
Lets for instance consider a possible schema for describing the variables:
var dataLayer = {
	user: false || "string",
	product: false || {id:"integer",name:"string",price:"double", category:["string"], quantity:"integer"},
	cart: false || { products:[product], total: "double" },
	order: false ||  { products:[product], total: "double", subtotal: "double", tax: "double", shipping:"double", order_id:"string" }
}
This implementation will help us to identify if the user has a session (if the user is not false), if there is a cart created and so on, following the same logic.
In this part we’ll need to configure this snippet to run in every page of the domain, this will initialize the tracking and listen for further action, this should be configured with the highest priority!
First we configure a ‘Page Load’ trigger that we will after attach to the base script.
Now we’ll create a Tag a link it with the created trigger.
Make sure to insert your correct CLIENT ID and LIST_ID.
var u=(("https:" == document.location.protocol) ? "https://cdn-te.e-goi.com/" : "http://cdn-te.e-goi.com/");
_egoiaq.push(['setClientId', "CLIENT_ID"]);

if({{user}} != 0){//this will make sure it will only set a subscriber if it's logged
    _egoiaq.push(['setSubscriber', {{user}}]); // You can use the uid (unique identifier) or the email or the phone number
}

_egoiaq.push(['setListId', "LIST_ID"]); // List identifier
_egoiaq.push(['setTrackerUrl', 'https://egoimmerce.e-goi.com/collect']);
_egoiaq.push(['trackPageView']);
var d=document, g=d.createElement('script'), s=d.getElementsByTagName('script')[0];
g.type='text/javascript';
g.defer=true;
g.async=true;
g.src=u+'egoimmerce.js';
s.parentNode.insertBefore(g,s);
At this point we would be able to identify subscribers interactions with your website and campaign statistics in your website.
When a user clicks in a specific product page we have a dedicated event which is called setEcommerceView.
This event should be only fired when there is an available product, for simplicity we will let our dataLayer to decide this and link it to the same trigger as before, and only send the information to Track and Engage if the product variable is not 0. We’ll be using Custom HTML Tag once again.
Use either the product id or SKU depending on the level of speciality you are looking for.
var product = {{product}}
if(product != 0){
  _egoiaq.push(['setEcommerceView',
      product.id,
      product.name, // (optional) Product name
      product.category, // (optional) Product category, or array of up to 5 categories
      product.price // (optional) Product Price as displayed on the page
  ]);
  _egoiaq.push(['trackPageView']);
}
The next step is to inform Track & Engage about all the products present in user’s cart. In every cart operation (either adding new item or removing) is mandatory to inform the full content of the cart.
For this we’ll iterate for all products present in the cart and make a addEcommerceItem for each one. After we’ll send the cart amount.
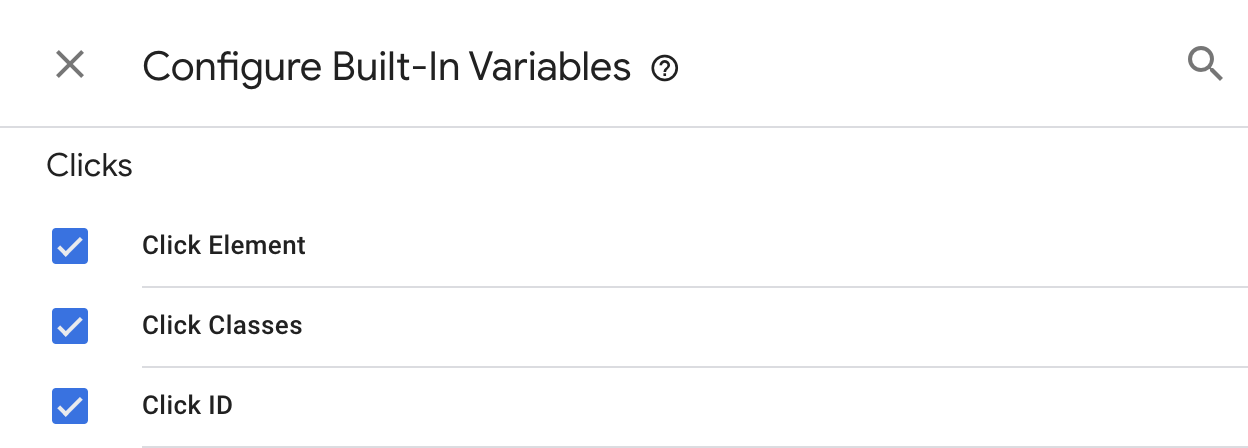
For this we created a trigger that is shot by every page click and identifies the last class clicked.
We are looking for identify every click in the ‘Add To Cart’ and ‘Remove from Cart’ buttons. To achieve this we configured in the GTM ‘Built-In Variables’ the ‘Click Classes’ variable.
Now we need to create a trigger that will identify when we click the desired button. For that we will filter by the CSS class the button has, you can confirm it in your browser by inspecting the html element.
Our Website’s example:
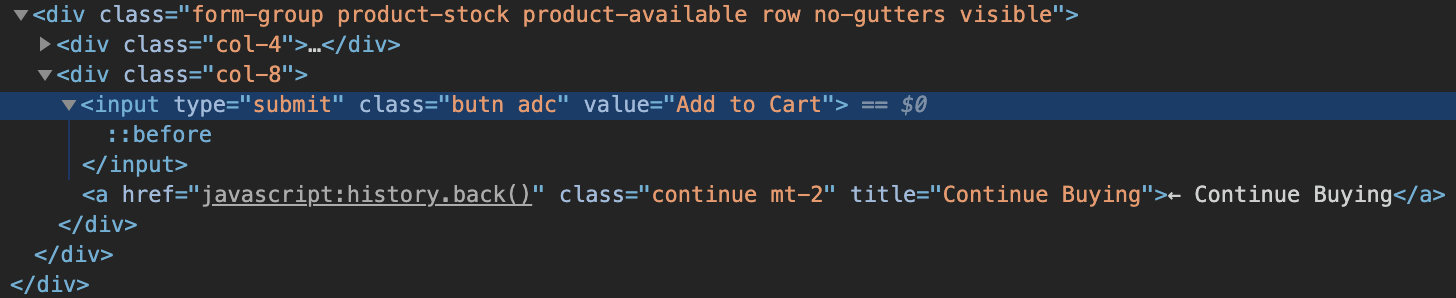
With that information we will make a trigger that will filter the clicks containing the target classes, in our case butn adc.
Make sure to create this all the needed trigger for sending this information, when occurs a cart information update, usual cases is when a cart product is inserted, removed or the quantity of a certain item changes. Make sure this information is updated in your dataLayer at all time and configure the correct triggers.
Next step is to link this trigger to a new tag. We’ll be using the cart variable with the same logic we did with the previous ones.
To this tag we need to link all previously created triggers for cart products information update.
var cart = {{cart}}
if(cart != 0){
    for(var i = 0; i< cart.products.length; i++){
        _egoiaq.push([
            'addEcommerceItem',
            cart.products[i].product_id,
            cart.products[i].name,
            cart.products[i].category,
            parseFloat(cart.products[i].price).toFixed(2),//parse information to .00 format
            cart.products[i].qty
        ]);
    }
    _egoiaq.push([
        'trackEcommerceCartUpdate',
        cart.total
    ]);
    _egoiaq.push(['trackPageView']);
}
Note: The prices should be in a float/double type of value.
For conclude this example we need to inform Track & Engage when a cart is converted into a order. The procedure is very similar to communicate a cart, instead of the trackEcommerceCartUpdate method we will be using the trackEcommerceOrder and send the information related to the order.
The same way as before we are expecting your website to have a post order page, commonly known as Thank You page, in this page we expect to have order variable present. Doing so we will use the same trigger we used for users, product and cart identification.
The following example is very similar to the cart information, we will verify if the order variable is present and if so iterate all products present there and communicate them.
Note: You don’t need to worry about duplicated orders, if orders have the same ID, they won’t be duplicated.
var order = {{order}}
if(order != 0){
    for(var i = 0; i< cart.products.length; i++){
        _egoiaq.push([
            'addEcommerceItem',
            order.products[i].product_id,
            order.products[i].name,
            order.products[i].category,
            parseFloat(order.products[i].price).toFixed(2),//parse information to .00 format
            order.products[i].qty
        ]);
    }
    _egoiaq.push([
        'trackEcommerceOrder',
        order.order_id,
        parseFloat(order.total).toFixed(2),
        parseFloat(order.subtotal).toFixed(2),
        parseFloat(order.tax).toFixed(2),
        parseFloat(order.shipping).toFixed(2),
      false
    ]);
    _egoiaq.push(['trackPageView']);
}
For testing purposes, you can see the information being updated in the chosen list with the sent subscriber in the fields related to Track & Engage.